When uploading images to your website it is important to optimise them for search engines. This involves making them faster to load and incorporating your location and keywords.
If you require an image for your website it is easy enough to upload a photo straight from your phone or to upload a stock image. The problem with this is that the file size is likely to be very large which harms the website’s SEO and takes a long time to load. The image is also likely to be called something along the lines of IMG024723.jpg which doesn’t tell search engines what it is about.
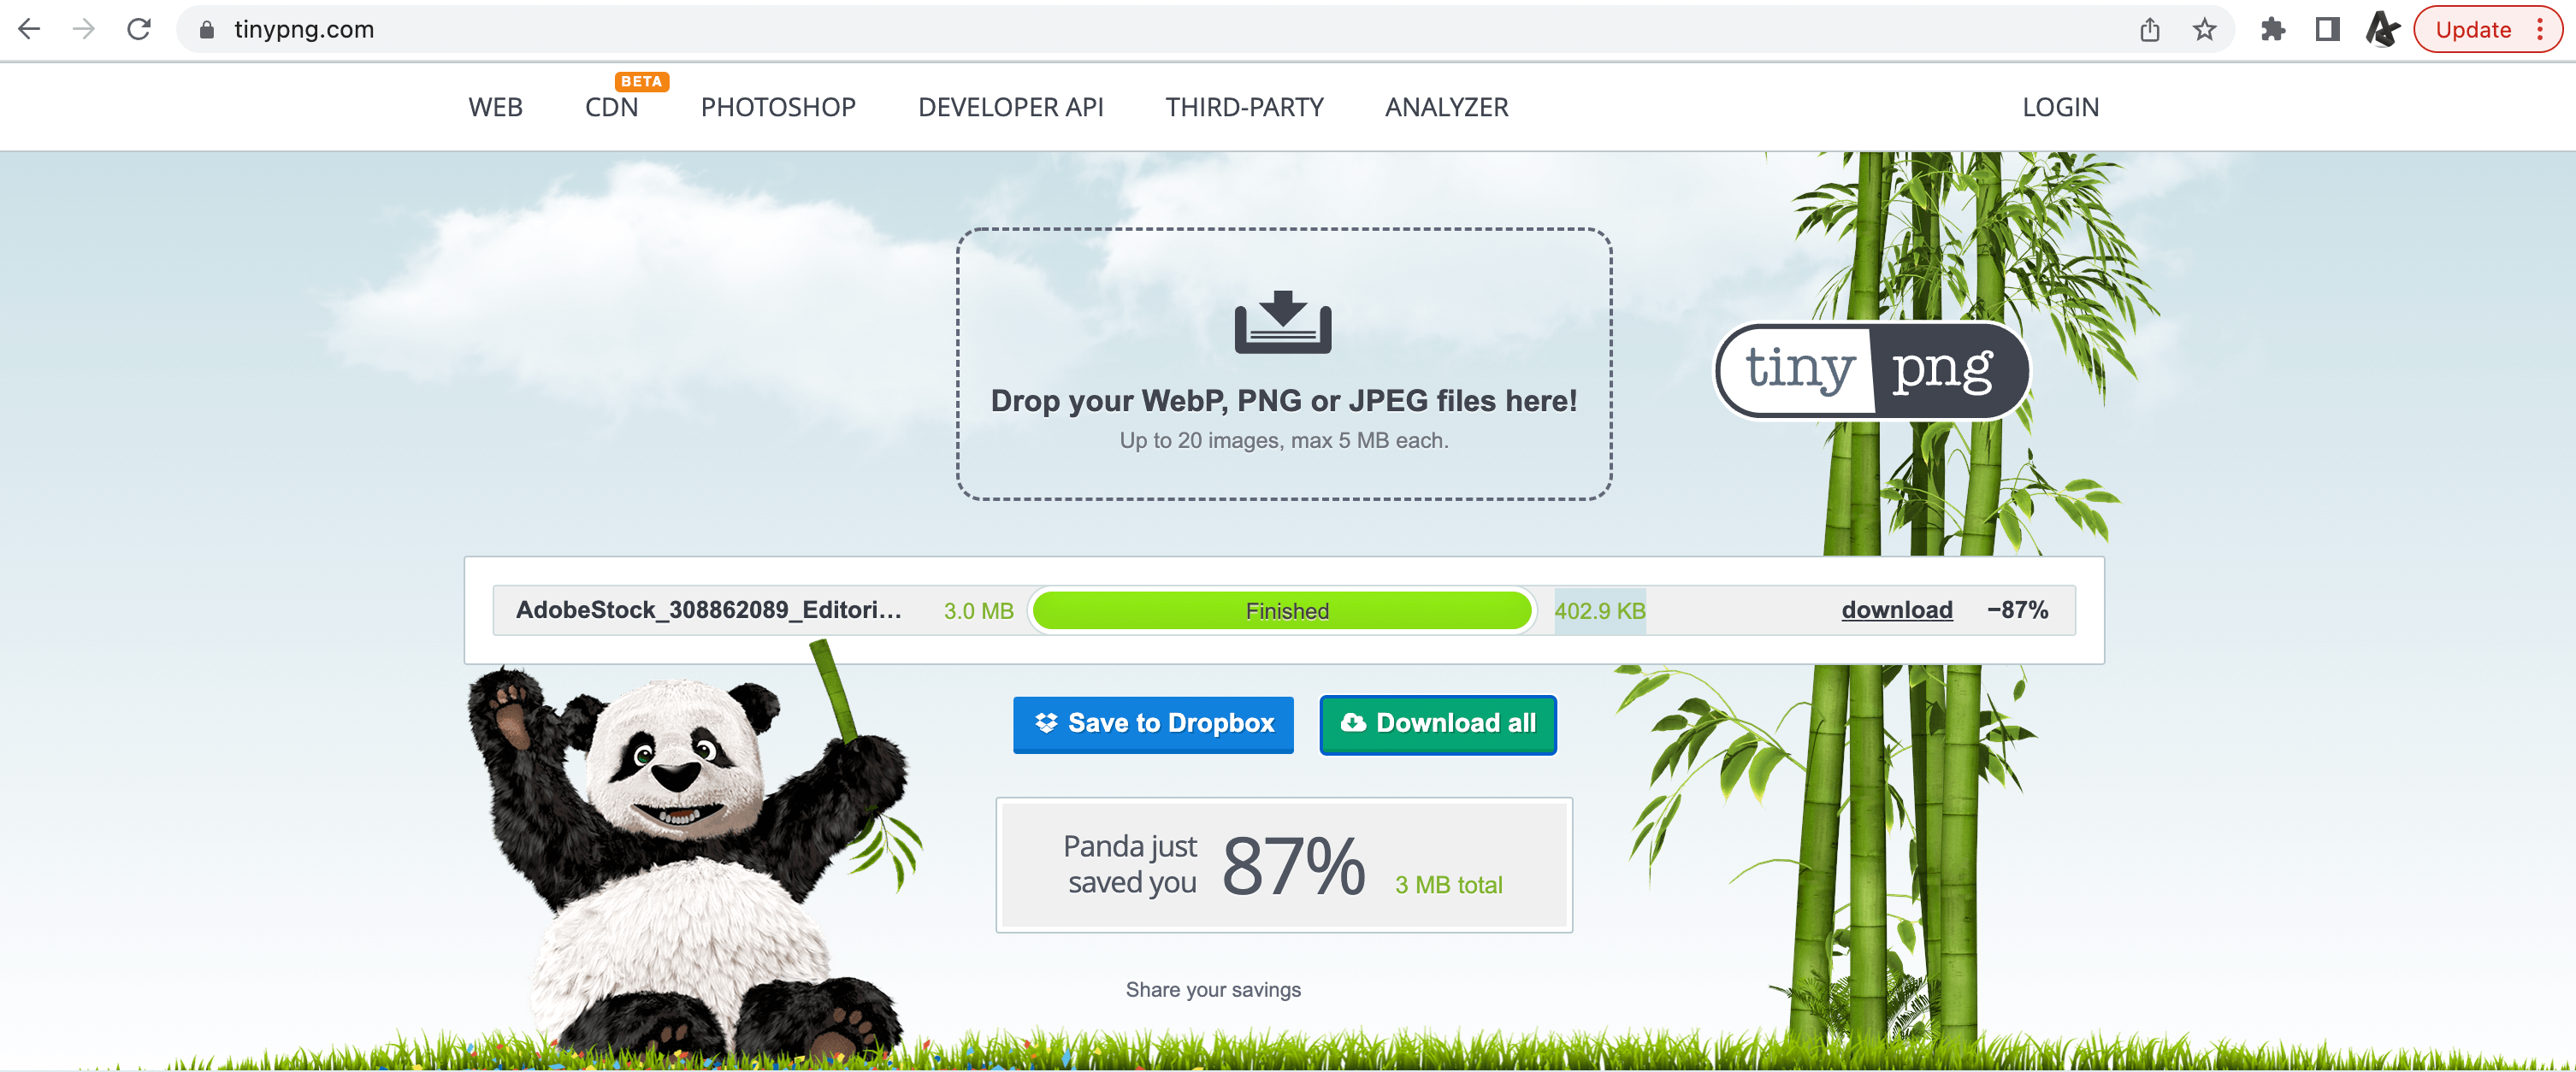
Before uploading your image to your website first of all visit tinypng.com and upload your image, the website will then compress it to reduce the file size but not the quality. Download the compressed image and rename it so that it contains your keywords.
Finally, visit tool.geoimgr.com. Upload your newly compressed image and enter the coordinates where the photo was taken using the map for help. Then add keywords, tags and a description. Download the new image and then use this newly optimised image on your website.
As an example, I downloaded an image called AdobeStock_308862089.jpeg from Adobe Stock photos. This image was 3MB or 3,027,715 bytes to be precise. After compressing it on tinypng.com the file size was 402.9 KB, a reduction of 87%.
 Next, I renamed the image to match my keywords, in this case, I renamed it ely-website-designer.jpeg
Finally, I uploaded it to tool.geoimgr.com and entered my coordinates, gave it the keywords “Ely web designer design agency” and the description “Ely web designer”.